Things to do in the garden in July

Half way through the year already! If I was a ‘glass-half-empty’ type of person, I might be inclined to remind you all that the nights are now drawing in. But since I’m not, I’ll just settle for ‘doesn’t time fly when you’re having fun’ and concede that I am actually still catching up from June, which was, let’s face it, a complete wash-out.

If, like me, you’re feeling a tad over-whelmed by how much of the garden needs attention, here are a few things that you can focus on:

Dead-head the roses

Don’t just snap off the old flowerheads; get out the secateurs and prune down to a healthy side-shoot or leaf bud. For floribunda (cluster-flowered) roses, prune off the entire truss of flowers, above a healthy leaf bud or side shoot. After dead-heading, water with a fertiliser specific to roses, or high in potassium.

Keep roses well watered to prevent powdery mildew and remove and dispose of any foliage with blackspot; it’s been such a wet June - practically everybody’s roses have been affected by this fungal disease.

Floribunda roses; dead-head by removing the whole truss of flowers, cutting above a healthy leaf-bud.

Floribunda roses; dead-head by removing the whole truss of flowers, cutting above a healthy leaf-bud.

Fruit and veg

Water tomatoes regularly and consistently, to prevent splitting. Also water courgettes frequently to avoid powdery mildew, but avoid splashing water on the leaves. Once the first fruits have started to swell, water both tomatoes and courgettes with a high potassium (K) liquid fertiliser once a week, making sure you follow the product’s dilution instructions.

Harvest your summer-fruiting raspberries, and then cut out the fruited canes, down to the ground. Thin new stems, and tie them into horizontal support wires - about 10cm apart from each other.

Apple trees often shed a large number of immature fruits in early summer. This is known as the ‘June drop’. After this has happened, consider further thinning of the remaining fruits, to ensure that the remaining fruits mature to a larger size and better quality. Thin pears and plums, as well as apples.

Thin apples after the ‘June drop’, to improve the size and quality of remaining fruit.

Thin apples after the ‘June drop’, to improve the size and quality of remaining fruit.

Trees, shrubs and flowers

Water young trees regularly, and particularly trees and shrubs in containers. Cut back the flowered stems and yellowing foliage of herbaceous plants that are past their peak, in order to give space to those yet to come into flower.

Summer bedding plants in hanging baskets and containers also need plenty of watering, even when it rains, and also frequent dead-heading to prolong flowering. Pansies and petunias tend to get a bit leggy at this time of year; a less laborious method for dead-heading them is to cut them down quite low with some secateurs and then water with a high-potassium plant-feed. This should produce new growth, and keep them flowering later into the summer.

Once irises have finished flowering, lift the whole clump of rhizomes with a garden fork, and cut younger, thumb-sized rhizomes away from the outside of the clump, discarding the older rhizomes from the centre. Cut away all but 15cm of the foliage with a straight cut, using a sharp knife. Remove any weeds, then replant the younger rhizomes (with their shortened foliage) just below the soil-surface.

Once they’ve finished flowering, lift, divide and replant iris rhizomes.

Once they’ve finished flowering, lift, divide and replant iris rhizomes.

And finally…

Keep weeding, keep watering, keep mowing, keep harvesting (particularly the mint for your Pimms), and most importantly, keep enjoying!


Time to prune your wiegela

Two years ago, my wiegela was cut back hard, down to four or five main stems (more like stumps really) about 30cm above the ground, in order to repair the brick wall behind.  The end result looked pretty brutal, like something they have in the zoo for the vultures to perch on. 

It is a resilient beast though, and last year, as expected, it put on plenty of new growth, and I refrained from pruning it at all, because I really wanted to see all that new growth in bloom this year.  And bloom it did…

My weigela in bloom, two weeks ago.

My weigela in bloom, two weeks ago.

It has now finished flowering, so it’s time to cut it back.  This should give it sufficient time to put on new growth before the dormant season, which will then flower next spring.

As with all pruning jobs, the standard approach applies; start off by getting rid of the three D’s; dead (or dying), diseased and damaged material.  None of these really apply in the case of my own Wiegela because most of the growth is healthy and productive, having sprouted from the main trunk only a couple of years ago. 

Prune weigela as soon as it has finished flowering

Prune weigela as soon as it has finished flowering

However, there is also a fourth pruning ‘D’ that I was recently introduced to - ‘Damned nuisance’.  As you can see above, a number of my wiegela’s flowering stems are trailing over the path, so I will shorten them to a convenient length, and all other overly-long stems by around one-third. 

I will also remove thin, spindly branches from their point of origin, so the plant can invest all of its energy into the stronger, more productive stems.  If your wiegela is congested with unproductive and / or crossing stems, thin these ones out by removing them at their point of origin, or as close to the ground as possible. 

Prune out the thinnest, weakest stems

Prune out the thinnest, weakest stems

For other strong, young stems, I will remove the tips, just above a node, a couple of nodes (or leaf-buds) down from the tip of the stem.  This should encourage more side stems to grow, and the bush should fill out during the rest of the growing season.

If your wiegela is old, neglected, and in need of rejuvenation, remove no more than a third of the largest, woody stems right down to the main trunk. These shrubs have a great capacity to bounce back so you can be brave.  Just don’t leave it too late, or there’ll be no flowers next year.


Let's hear it for hedges!

Privet (Ligustrum ovalifolium) - the small leaves make a compact, evergreen hedge

Privet (Ligustrum ovalifolium) - the small leaves make a compact, evergreen hedge

Early this year, I flicked on Radio 4’s Inside Science mid-review of recent research into the environmental benefits of hedges.  Frustratingly, I can’t find the podcast now, but I believe the research was undertaken by the University of Surrey, and studied the effectiveness of green infrastructure (trees, shrubs and hedges) in reducing pollution concentrations in the vicinity of roads. 

Researchers studied a number of roadside locations in Guildford, and found that hedges were the most effective green infrastructure for reducing pollution.  Hedges were found to reduce exposure to ‘black’ carbon by up to 63 per cent, with exposure to ultra-fine and submicron particles also showing an appreciable reduction.

Having spent seventeen years working in transport planning, I’m well aware that green infrastructure can be unpopular with municipal authorities.  Hedges particularly are costly to maintain; they can restrict visibility for road users and pedestrians, and cause a perceived reduction in security and safety. 

However, as air pollution levels in many cities, Manchester included, often exceed ‘safe’ levels, the demonstrable benefits offered by hedges and other forms of green infrastructure shouldn’t be ignored: A primary school student from East Dulwich was interviewed by the BBC following the installation of 2.2m high ivy-clad green wall along the school’s boundary with an adjacent busy A-road. As an asthma sufferer, the student affirmed that he had previously been unable to play outside without coughing, but now could, due to the green screen. 

The RHS are currently preparing a report on the benefits of hedges, appropriate species and optimal specifications, and I shall definitely report back here when it’s published, but here are a few considerations:

  • Evergreen species such as privet and holly offer screening benefits all year round;

  • Beech is a good deciduous choice as it holds on to its leaves throughout the winter, even when they are dead;

  • Hornbeam is also a good deciduous choice because it is fast-growing, and sometimes holds its foliage during winter;

  • Species with hairy leaves are particularly effective at catching and filtering out airborne solid particulates.

Given the government’s recent commitment to net zero emissions by 2050, clearly a far greater step-change is required than planting a few hedges.  But if we all contribute by taking a serious look at how we use resources and travel, keep our private car use to a minimum and play our part in planting and nurturing our own green infrastructure, then collectively, we can make a difference.

Hornbeam (Carpinus betulus) - a fast-growing deciduous hedge

Hornbeam (Carpinus betulus) - a fast-growing deciduous hedge

Things to do in the garden in June

As a mostly dull and damp half-term holiday draws to a close, I almost feel nostalgic for the memories of last year’s too-hot camping trip in the Lake District, and swotting for my RHS exams in the garden.  Are we going to be in for another flaming June this year?  Sadly, for those of us in the north, the short answer is no, but at least this will reduce the burden of watering. Plenty of jobs to be getting on with though, as the growing season is at its peak.

watering-can-397290_1920.jpg

Mulch

Any time is a good time to apply organic mulches to your borders, and during the summer, mulches help to retain soil moisture and suppress weeds.  I’ve just ordered bulk bags each of compost and manure, in order to give my borders some TLC, and top up the neglected planters at the bottom of the garden.  Weed and water thoroughly before applying the mulch.

Bedding Plants

If you have identified some gaps in your borders and like a quick fix of colour, now is the time to procure and plant some bedding plants.  They can then be replaced by more sustainable and longer-lasting perennials in the autumn, when they’ve finished flowering and died back.

Shrubs and climbers

Once mature deciduous shrubs such as Wiegela, Deutzia and Philadelphus have finished flowering, prune out about one in four of the oldest, thickest stems (take a view on this from below, looking up through the plant) and also any dead, diseased or damaged material.  If you have climbing or rambling roses, these grow very vigorously at this time of year.  Keep training and tying them in, as close to the horizontal as possible.

Philadelphus - or ‘Mock Orange’

Philadelphus - or ‘Mock Orange’

Deadheading

Removing faded blooms from perennials, repeat-flowering roses, hardy and half-hardy annuals extends their flowering season.  Removing spent flowers from camellias, rhododendrons and lilacs ensures that the plant’s energy is diverted into making new buds for next year’s flowers. Take care when removing rhododendron and camellia flowers, as the new buds form just below the flowers.  Cut back flowered lilac stems down to just above a pair of leaves or buds.

In the veg garden

Keep up successional sowings of salad leaves; I definitely need to thin out the chard and spinach I sowed a few weeks ago. Any French or dwarf beans, runner beans, or courgettes raised indoors can be planted outside, now the risk of frost has passed.

Tomato plants can also be planted outside, in pots, growbags or directly into the soil. Choose a sheltered, south-facing spot against a wall, if possible.

tomato-3466644_1920.jpg

Keep calm and keep on mowing

And finally, keep mowing the lawn, remembering that it is better to remove a smaller amount more frequently than to completely scalp it every fortnight.

A crash course in Clematis pruning

The previous occupant of our house was obviously a keen Clematis cultivator.  I feel a twinge of guilt when I recall the specimens we sacrificed whilst removing the rampant Russian Vine from the trellis around our decking, and the others that bit the dust when the boundary fence blew down.

Half a dozen or so still remain, and they’re looking pretty spectacular at the moment.  However, like a number of plants in my own garden, they’ve been somewhat neglected and the time has come for me to sort out what should be done, and when to do it, for each clematis.

Clematis fall in to three pruning groups, based on when they flower.  Those in groups two and three need regular pruning otherwise they produce long, bare stems, with all the flower interest at the top.

Clematis Pruning Group 1: Early flowering

This group flowers on shoots produced the previous season, and includes the well-known and vigorous Clematis montana.  Group one clematis don’t generally need regular pruning; just the removal of dead, diseased and damaged wood, but if they are overgrown or out of control, prune to shape in mid to late spring, after flowering.  My Clematis montana is not long past flowering so this is going on my to-do list for the weekend, before it engulfs my other, slower growing climbers. 

Clematis montana - a group one clematis

Clematis montana - a group one clematis

Clematis Pruning Group 2: Mid-season flowering

Group two consists of large-flowered varieties that bloom during May-June on the previous season’s growth.  I’m quite fond of the pink striped cultivar that I’ve inherited, which I think is probably Clematis ‘Nelly Moser’.  For group two clematis, lightly prune in the summer, after the first flush of flowers.  Smaller flowers will then be produced on the current season’s growth. 

Then, in late winter / early spring, aim to establish a framework of older wood and stimulate new growth by removing weak shoots, thinning congested growth, and cutting about a fifth of the oldest stems to 30cm above the base. 

Clematis ‘Nelly Moser’ - a group two clematis

Clematis ‘Nelly Moser’ - a group two clematis

Clematis Pruning Group 3: Late-flowering

Group three clematis are great additions to any garden in order to extend the flowering season; they flower from midsummer through to autumn on wood produced during that same season.  I have what I believe to be a beautiful blue Clematis ‘Perle d’Azur’, but I can see already that my failure to prune it properly this winter has resulted in it becoming a bit top-heavy. 

For Group three clematis, prune in late winter or early spring (Feb, or early March for us northerners), as the buds begin to show signs of breaking.  Prune the stems back hard to the first pair of leaf-buds on the stem, which will be about 15-30cm above soil level.  This will stimulate the breaking of dormant buds near the base.  It looks pretty brutal, but it’s the way to go, honest!

Put your stingers to good use; how to make nettle fertiliser

Experiential learning probably resulted in nettles being one of the first plants we could identify; Urtica dioica – touch ‘em and it ‘urts.  When I was growing up, even our little wire-head fox terrier knew to keep away from them.

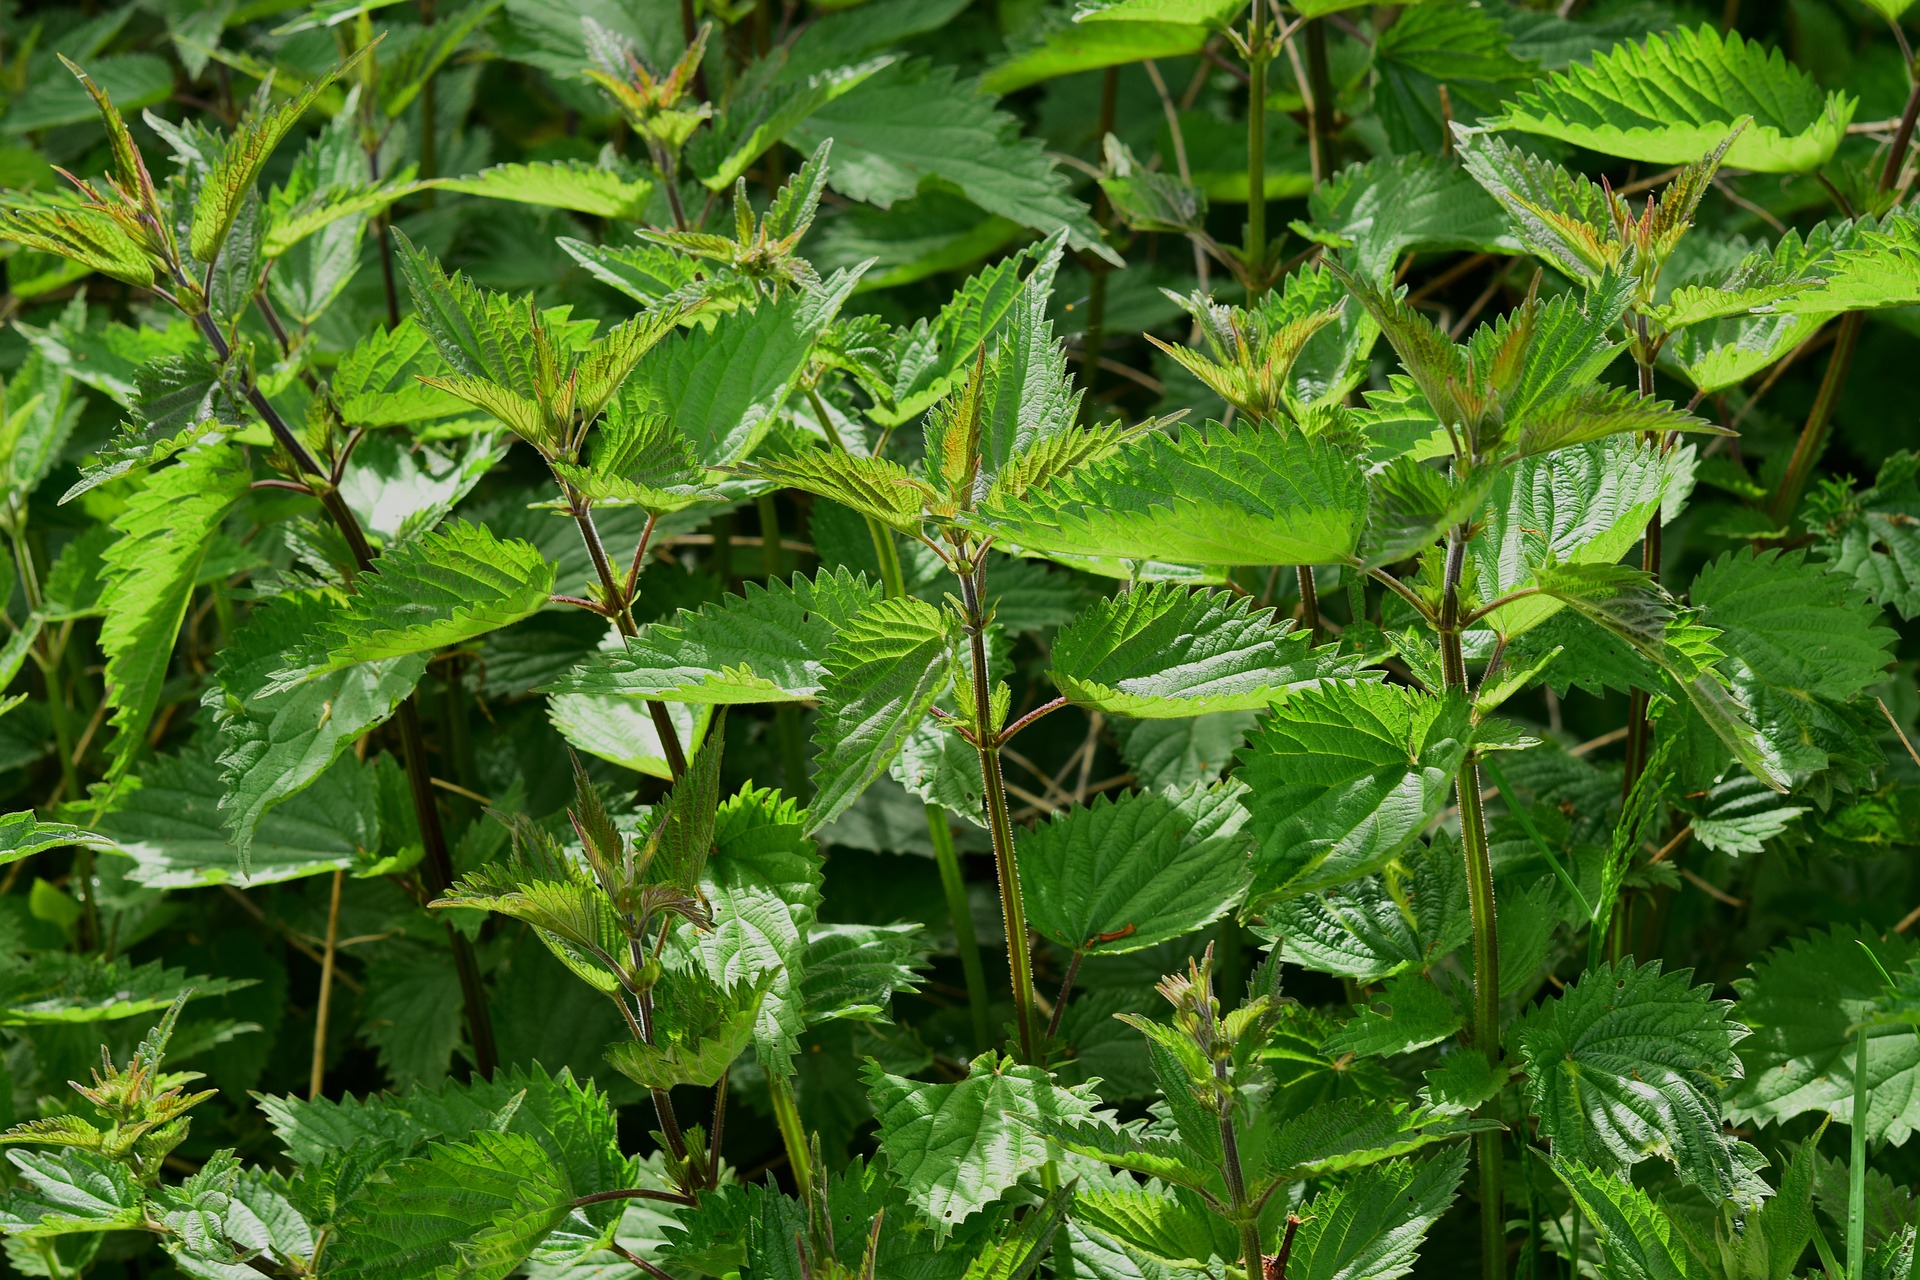
Urtica dioica - common, or stinging, nettles

Urtica dioica - common, or stinging, nettles

In the UK, the most widely go-to antidote to nettle stings is to rub a crumpled dock leaf (Rumex obtusifolia) over the sting.  Anecdotally, this calms the skin’s reaction to the histamine and other complex chemicals delivered by the stinging-hairs, or trichomes, on the nettle leaves. 

However, on looking into why this might be so, I have found minimal scientific evidence to explain the calming effect of dock leaves on nettles stings, but never underestimate the placebo effect, when you are out for a country walk with young children wearing shorts.

It’s important to note that nettles have a high habitat value, supporting some of our favourite butterflies, such as the small tortoiseshell and peacock.  They are also a valuable food source for seed-eating birds. 

Tortoiseshell butterfly larvae

Tortoiseshell butterfly larvae

That said, if you did want to cut back on the stingers in your garden, they needn’t be consigned straight to the municipal green waste bin.  You can turn them in to a highly nutritious organic fertiliser for your garden.

Make your own nettle Fertiliser

When diluted and watered in, home-made nettle fertiliser is rich in nitrogen and also provides chlorophyll, magnesium, sulphur, iron, potassium, copper, zinc and calcium, and a whole host of vitamins.  It also makes a good compost accelerator.  Here’s how to make your own;

You will need;

·        Gloves (preferably long);

·        Nettles;

·        Garden shears;

·        A bucket;

·        A brick;

·        Some patience.

Step 1: Put on your gloves (!) and gather your nettles.  Young stems are best.  Remove the roots.

Step 2: Bruise and scrunch the nettle stems as you squash them into the bucket.  Use the shears to chop them up.

Step 3: Weigh the nettles down with the brick, and immerse them with water.

Step 4: Move the bucket to a far-off corner of the garden (it gets smelly!) and leave it for four weeks.

Step 5: When the mixture is ready, strain off the liquid and transfer it to an empty screw-top bottle. Then give your garden a good water, in the normal way.

Step 6:  Dilute the fertiliser in your watering can, using no more than one-part nettle fertiliser to ten parts water.  Remove the watering can rose and apply the dilute fertiliser to the soil immediately surrounding the base of your plants, fruit and veg, throughout the growing season. You can also use it as a foliar feed if you dilute it to one part fertiliser to twenty parts water.

Your garden will appreciate the fertiliser, and it won’t cost you a penny.

stinging-nettle-141508_1920.jpg

Things to do in the garden in May

Woah! I can’t believe we are a third of the way through May already. It’s been so long since I’ve written anything here, I couldn’t even remember my website’s log-in details. I’ve been pretty busy - mainly keeping the weeds at bay - but there are some other things that need doing too:

Staking herbaceous perennials

Some plants, like Delphiniums (and later, sunflowers), have brittle stems that snap easily, and need supporting as they grow taller to protect them against wind damage or collapsing under the weight of their own blooms. Even shorter perennials, such as oriental poppies need staking, especially if they are likely to flop over the edge of the border and damage lawn turf.

Use a mallet to hammer three or more bamboo canes, spaced around the plant, placing the canes a few centimetres outside of the clump, to avoid damaging the roots when you hammer them in. Tie string between the canes to hold them in place, in a ring surrounding the plant. Single-stemmed plants can be tied to a single cane; tie the string tightly to the cane and then loosely around the stem. Use a reef knot that won’t tighten up in the wind, and cause damage to the stem.

Lawns

It’s the time of the year when the lawn needs mowing at least once a week. This helps keep the weeds down, but weeds such as plantains and dandelions can be removed by hand. Don’t cut the lawn too short though; bare patches will result in moss and weeds colonising.

If you haven’t done so already, apply a lawn feed. This keeps the lawn healthy because continual grass removal impacts upon its vigour. Make sure lawn-feed is applied as per the product instructions; using more than recommended can result in scorching the lawn.

Use a half-moon lawn iron to make a well-defined edge between the lawn and the border. You’ll be amazed at how this simple job can perk up the whole garden.

lawn-mower-1593898_1920.jpg

Pruning jobs

Prune any early-flowering shrubs that flower on wood produced last year, once they have finished flowering. My Ribes sanguineum (flowering currant) has pretty much finished doing its stuff by now, so I will be cutting out any dead, diseased, damaged and crossing stems, and any weak spindly ones. I will then cut back flowered stems to a healthy bud lower down. My trusty RHS pruning book also advises removing around a fifth of older stems to the base.

My Choisya ternate (Mexican orange blossom) doesn’t generally need much pruning, but it has a bit of frost damage, so I will be pruning that out.

In the vegetable patch

Despite my best intentions and winter-fireside planning, I’m failing miserably in this department. However, if you have them, brassicas can now be planted out in their final cropping positions (I do actually have two Brussels sprouts - acquired from my college class. Well, at least, we think they are Brussels sprouts. The labels got lost at some point in the nursery process).

Sow your courgettes now - I’m going sow mine inside first, but if you do plant them directly outside, make some cloches out of halved plastic drink bottles to protect them from the cold, and be mindful of the amount of space they need; allow 75-90cm between plants.

Pinch out the tips of your broad bean plants when they flower, to discourage black fly.

So little time!

If you are hard pressed for time and space, but still want the satisfaction of ‘growing your own’, you can start successional plantings of salad leaves and rocket, and herbs such as coriander and dill. You can grow these in small containers or window boxes. You can then have fresh salad and herbs at your finger tips; tastier and much more cost effective than buying them from the supermarket.

cilantro-2192646_1920.jpg

Sunday afternoon garden power-hour

Okay, it was probably closer to two hours, but I can confirm it didn’t involve any alcohol! That was probably why it was so productive. This is what I did:

1. Weeded out the pesky green alkanet:

I’ve already commented on this one recently! It’s important to get the whole root out, and the big ones certainly hold on tight.

Green alkanet - Pentaglottis sempervirens

Green alkanet - Pentaglottis sempervirens

As a rule, I keep the perennial weeds separate from compost destined for my own garden compost bin. The perennial weeds go in the green municipal waste bin, because the composting temperatures reached at the waste facility prevent the plants from regenerating.

2. Trimmed away old foliage from the Heucheras

I bought these Heucheras last year when attempting to give the bed in the front garden a bit of a face lift.

Heucheras - old, more silvery foliage, and brighter, new foliage

Heucheras - old, more silvery foliage, and brighter, new foliage

The paler, softer new foliage and flower spikes of the Heucheras grow up from the centre. To give them some room, I snipped away last year’s darker, greyish foliage from around the edge.

Heucheras after trimming

Heucheras after trimming

I use my dead-heading scissors for this one; their narrow blades make it easier than secateurs for making direct, targeted snips near the base of the stems, without running the risk of damaging the stems you want to retain.

Dead-heading scissors - useful for snipping away old foliage, at the base of the stems

Dead-heading scissors - useful for snipping away old foliage, at the base of the stems

3. Trimmed away old foliage from the Epimedium perralderianum:

I’ve always been a little underwhelmed by my three, slowly spreading Epimedium plants - but perhaps that was because I never treated them right.

Last year’s foliage on the Epimedium perralderianum

Last year’s foliage on the Epimedium perralderianum

Having just last week been given appropriate instruction and a demonstration in the border outside the front entrance to Cheadle College, I now know that early spring is a good time to snip away the old foliage at the base of the stems, to reveal the new, hairy leaves coming through. I’m hoping I’ll feel different about them this year.

New, hairy foliage starting to emerge

New, hairy foliage starting to emerge

4. Transplanted the winter-flowering heathers from my container

My containers are definitely looking past their best, but the heathers can continue to look nice in their new location in the bed. I mixed some ericaceous compost into the planting holes, since they are an acid-loving plant.

20190407_174852.jpg

5. Finally, just a few moments before it started to spit with rain…

I gave everything a thorough water. It has been a very dry spring so far, and this particular bed has to compete for water with an enormous beech tree. And since I had the bag of ericaceous compost to hand, I also put a few handfuls of it around the base of the ericaceous Camellia and the Pieris and watered it down again.

Next week’s plan…

I swear that my Bergenias are the most dog-eared and moth-eaten I’ve ever seen. I can’t remember the last time they flowered. I don’t think it's slugs but I believe Bergenias are prone to Vine Weevil; the destructive larvae feed on the plant roots whilst the adult Weevils eat notches into the edges of the leaves. My plan is to lift all the plants with the intention of dividing them. The presence or absence of the cream-coloured c-shaped larvae will determine whether I bin them or replant the divisions. I’ll keep you posted.

Bergenia cordifolia - possibly suffering from attack by Vine Weevils

Bergenia cordifolia - possibly suffering from attack by Vine Weevils