A few ways to combat slugs

My biggest big sister recently sent me a book entitled ‘100 Ways to Kill a Slug’.  She knows I am a sucker for any horticultural literature.  That said, I wasn’t quite sure what to make of another literary gift from a good family friend called ‘100 Plants that won’t die in your garden’…  but always up for a challenge, me.

As the weather warms, slugs become more of a pest.  They are frustratingly robust against cold weather, as they can over-winter as either eggs, juveniles or adults.  Just as you are thinking of starting to sow your first succession of spinach and salad leaves, and planting out anything tender, so too should you be considering how to protect them from slugs and snails.  Here are some of the one-hundred methods that I am more familiar with.

Beer traps

To now, this has been the most effective slug-control method for me; sink a jam jar of beer into the soil near your young leafy crops to attract and intoxicate the slugs.  Empty the traps by straining through a flower pot lined with kitchen paper, and throw the slugs in the green waste bin.  In my experience, slugs have a preference for real ale over Jamaican Red Stripe.

Parasitic nematodes

Last week, at Cheadle College, we watered around our raised beds with some ‘Nemaslug’, in order to tick the ‘Biological Control’ box for our Level 2 assessment.  First of all, we cut away all of the long grass immediately surrounding the raised beds, to expose the soil.  This is the place where slugs are known to enjoy hiding – where the soil meets the timbers – so the target for nematode-watering.

The nematodes are parasitic worms that are mixed into the water.  Once applied, they enter the slugs and release bacteria that stop the slugs feeding and they die, generally whilst still underground.  You need to keep the packet sealed and refrigerated until use, and then read the instructions carefully about the required quantities and dilution rates.  Despite being miniscule, the nematodes still blocked the watering can roses, so use a course rose.  The treatment lasts about six weeks, and is not harmful to children, pets or wildlife.

Cultural control

Apparently, slugs dislike the strong smell of mint, chives, garlic, geraniums, foxgloves and fennel, so planting these around your garden will help deter them.  Also, consider gardening in a way that attracts beneficial organisms that enjoy eating slugs such as frogs and hedgehogs.  Possibly one for another year now, but hoeing the ground in early spring can also expose the white spherical eggs, which are then picked off by birds.

Other methods

·        Go out in the dark with a head torch, particularly after rain, and collect up the critters by hand;

·        Place empty grapefruit skins, outer-skin side up, on the grass or beds.  In the morning, they will apparently be full of slugs, throw the skins plus slugs into the green bins;

·        Sprinkle cut hair or pet hair around the base of your plants;

·        Torch the slugs with a weed-burner (!);

·        Barriers made of copper tape, soot, diatomaceous earth, or sprinklings of dry grit and sand.

Quite a choice of battle strategies here!  Let me know what’s worked for you.

slug-3441015_1920.jpg

Slugs - not the gardener’s best friends

Things to do in April

The clocks have gone forward and April is upon us; I can’t wait for the longer, lighter evenings to get stuck in to the backlog of tasks in my garden.  For me, many of these aren’t even horticultural, and involve shifting rubble, painting garden furniture and tackling slippery decking, but all of them will contribute to my enjoyment of the garden as a whole.

Be prepared for very changeable weather; I was gardening in short-sleeves last week, and yesterday I got snowed on.  You may notice the garden centres stocking up on summer bedding plants.  Don’t be tempted to invest in them just yet though, unless you can protect them inside a frost-free greenhouse. 

Here’s the plan for my garden this month:

Sow hardy annuals

For those of us residing ‘oop north’, it’s best to wait until later in the month before sowing hardy annuals in situ.  We have a lot of heavy clay in our garden, which takes longer to warm up than sandier soils, so I’ll be waiting a little longer. 

I failed miserably to sow my sweet peas either in the autumn or indoors, so I will just sow them straight into the ground instead.  This year I will remember to erect some supporting netting, before sowing.

Pruning

Now is the time to prune silver-leaved shrubs like lavender – once they have reached the desired size.  Annual pruning every spring helps to keep them bushy and compact, but don’t cut into old wood. 

I have a Cotinus coggygria (smoke bush), which gets its best colour from new foliage, so it’s a good idea to prune lightly to stimulate new growth.  Leave a few longer and stronger stems intact, to maintain its structure.

Cotinus coggygria - Smoke Bush

Cotinus coggygria - Smoke Bush

Fruit and Veg

Later this month, I will be sowing my fruit and veg seeds; carrots and peas directly outside, and the French beans, courgettes and tomatoes in pots indoors.  I have five first-early potatoes chitting on the windowsill, destined for my old Manchester City Council Kerb-it recycling box.  I will leave plenty of space in order to be able to keep covering the new foliage with compost.  This encourages the development of more tubers.

Other jobs

Dead-head the daffodils, leaving the foliage until it turns yellow.  Keep the borders free of weeds, and plant any summer or autumn-flowering bulbs such as gladioli, dahlias and cannas, in a sunny well-drained location. 

It’s a busy month – there’s plenty to be done – but I’ll keep you posted!

Enjoying the bright new foliage on my Pieris, alongside the pink tulips in my front garden

Enjoying the bright new foliage on my Pieris, alongside the pink tulips in my front garden


Integrating a Garden Railway – Part 1

I can’t deny it.  I knew what I was marrying into.  My husband’s enthusiasm for trains, railways (both home and abroad) and his very specific and loyal affection for the Ravenglass and Eskdale Railway in West Cumbria has brought with it excuses for some fabulous holidays, a strong circle of wonderful friends and many moments of hilarity.

It’s not surprising then, that during the 2018 Christmas break, our garden acquired fifty or so metres of 32mm gauge track on which my husband can now run his 16mm scale steam engine.

Key considerations

As March blows on into April, we are hopeful that we can go out and enjoy the railway a little more.  However, the paved, far end of the garden (which also serves as a turning circle for the railway) is looking pretty shabby and would welcome a bit of a mini-makeover.

It’s pretty shabby right now - but at least it will make the ‘before and after’ photos more effective.

It’s pretty shabby right now - but at least it will make the ‘before and after’ photos more effective.

I say mini, because at some point, we need to rebuild the wall where the neighbour’s tree has grown through it, rendering it unstable.  I therefore need a temporary solution, to avoid any permanent planting being trampled on by the brick layers, in the event that wall-rebuilding ever makes it to the top of my ‘to-do’ list.

The Plan

I have never been a big fan of seasonal bedding plants; expending a load of time and resources planting and watering them, and then tearing them out when the winter comes seems a little pointless.  However, I think in this instance, temporary bedding would be an appropriate solution.

For the first time ever, I have grown some Busy Lizzies from seed.  I have chosen a really pale pink cultivar; ‘Campos Rose Splash’.  White and pale colours are good choices for shady areas, and Busy Lizzies are also shade tolerant.  They also flower over a long period, especially if you take the time to go and dead-head them. 

I sowed the seeds and placed them into my new heated propagator.  They actually germinated after just a few days, and my next job is to prick them out in to their own modules and grow them on.

Busy Lizzies - Impatiens walleriana ‘Campos Rose Splash’

Busy Lizzies - Impatiens walleriana ‘Campos Rose Splash’

Whilst we are waiting for the seedlings to grow and the weather to improve, there’s plenty of work to be done clearing weeds and rubble from the end of the garden, disposing of the redundant Christmas tree, topping up the compost in the planters and perhaps repainting the garden furniture.  I’ll keep you updated on my progress!

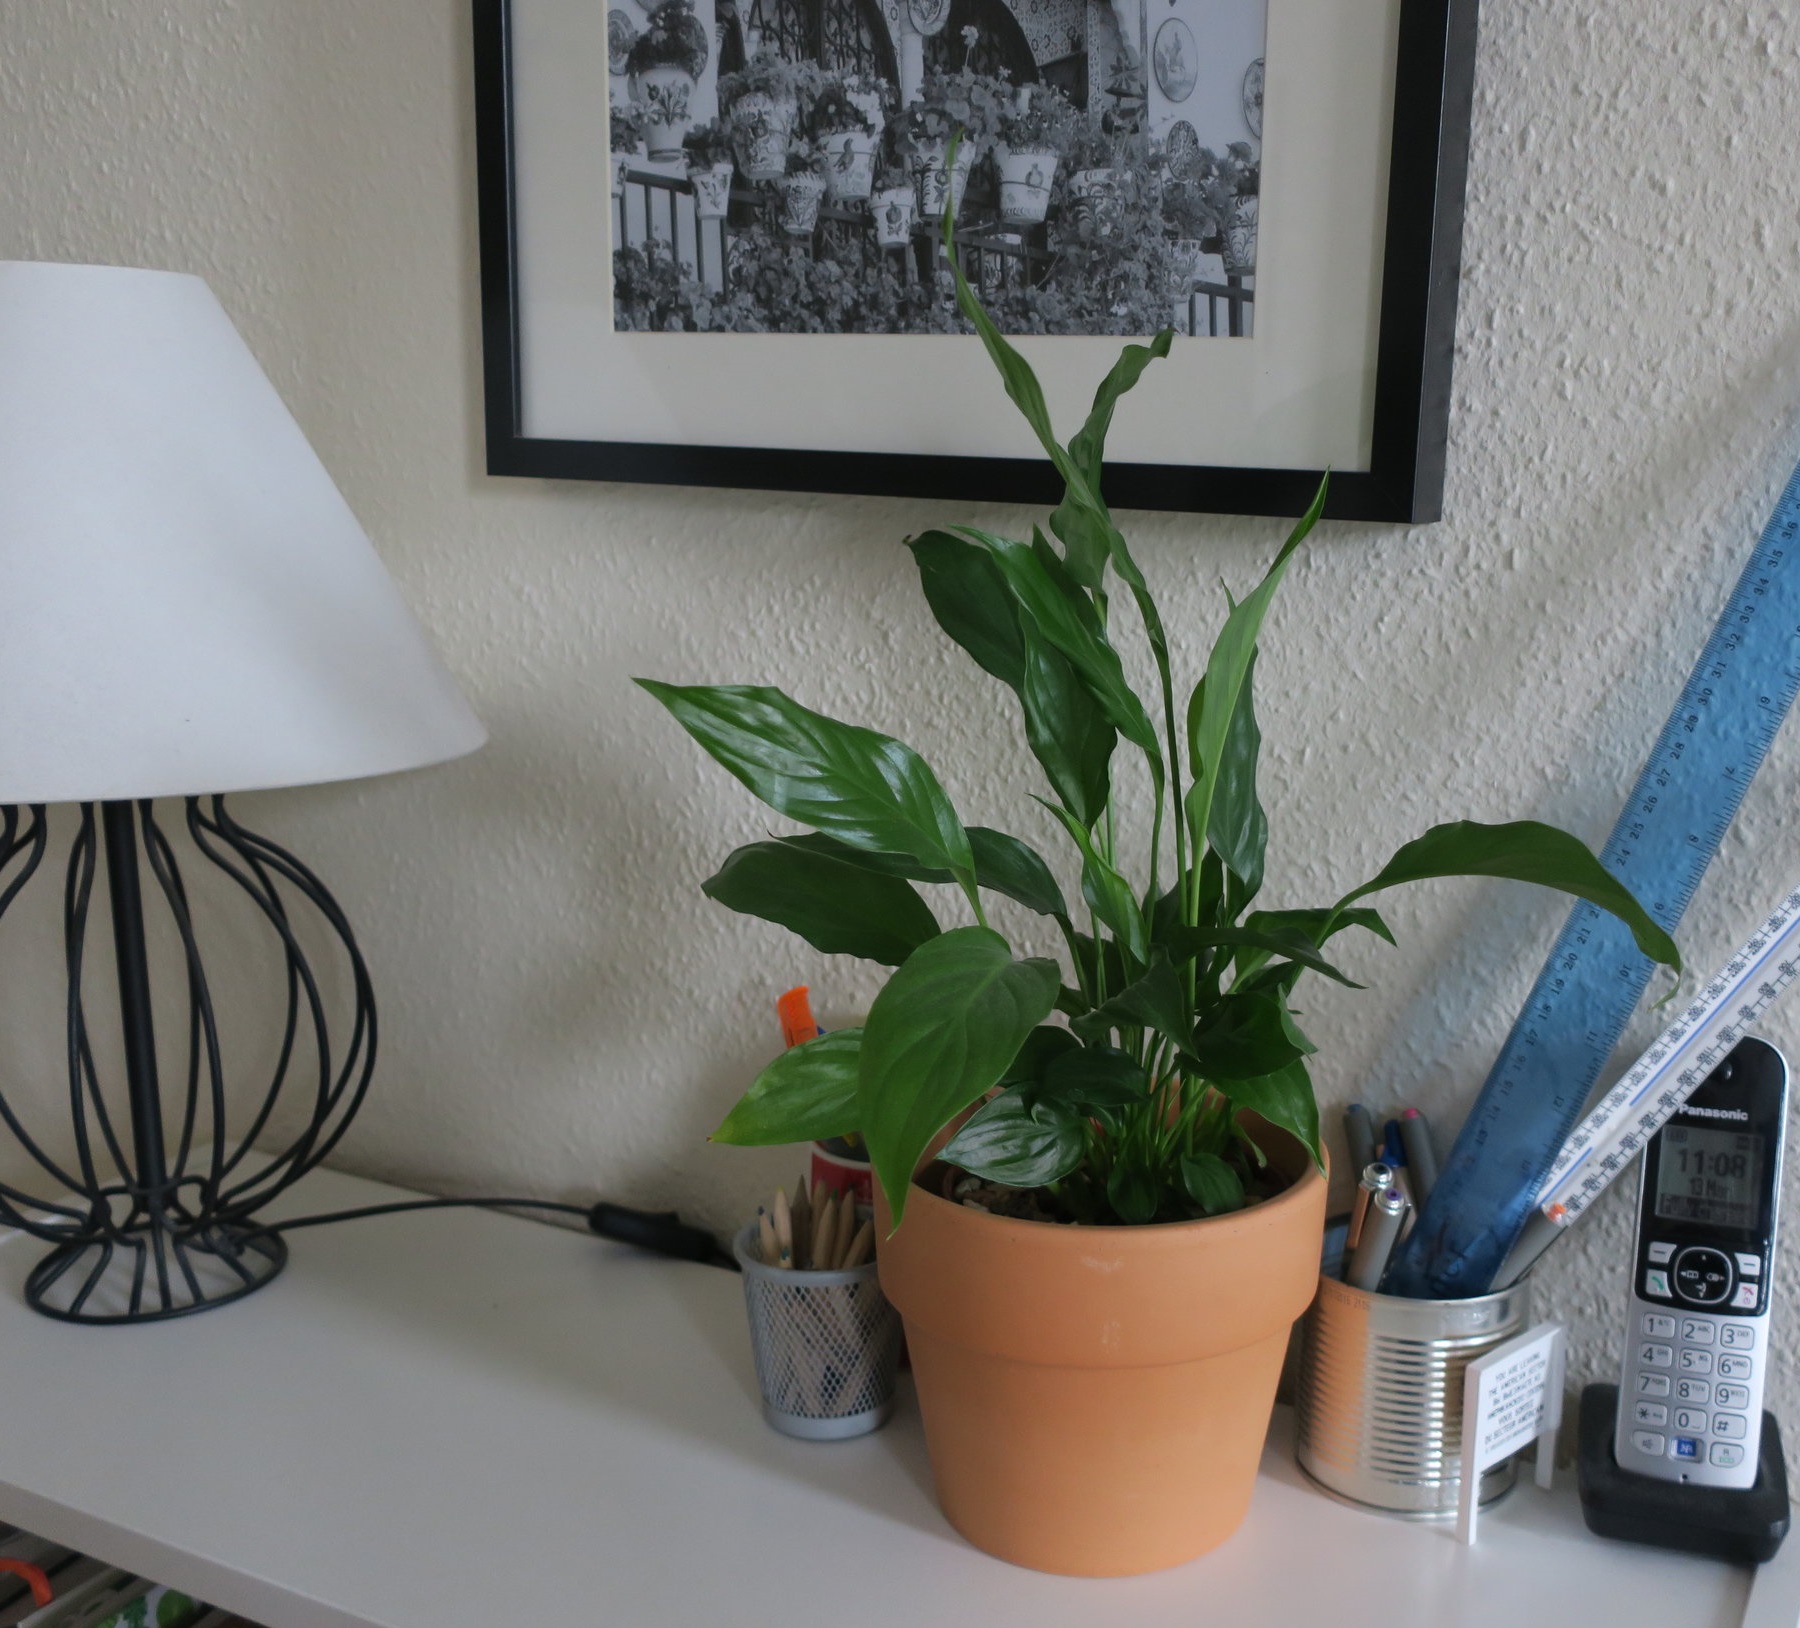
The Purifying Peace Lily; Spathiphyllum wallisii

blob

I have very recently become the proud owner of this Peace Lily (Spathiphyllum wallisii). I love the way the bright shiny green leaves contrast with the monochrome décor surrounding it.

A few weeks ago, a fellow student in my RHS practical class brought in her own, rather pot-bound and over-crowded Peace Lily. We removed it from its old pot, divided it, and re-potted the divided sections, and behold! There were enough Peace Lily plants for all class members to take one home with them. I talk to it daily, and I’m really hoping it will produce one or two of its distinctive white flowers, this summer.

It’s been a while since I’ve had any house plants. I think they mostly died of neglect and consequent desiccation. However, the Peace Lily is the perfect choice of house plant for me. When it needs a drink, it lets me know by very visibly drooping in protest. Never fear though; if you water it immediately, it perks up straight away.

Caring for your Peace Lily

Be careful not to over-water your Peace Lily; apparently over-watering is the most common cause of all house-plant deaths over and above anything else. Do not place it in direct sunlight otherwise the leaves can get scorched. Most of the foliage of the Peace Lily grows directly out of the soil, so it is exactly right for propagating by division when it becomes root bound. And the re-potted sections make great gifts.

Why are Peace Lilies special?

Most of us understand that house plants make an important contribution to replenishing oxygen levels inside our rooms. Research undertaken by NASA has also found that Peace Lilies are particularly effective in removing two other chemicals from the air of enclosed spaces, both of which can be damaging to health, if their concentrations become too high.

The first of these is Benzene which is naturally given off by some paints, rubber, tobacco, smoke, detergents, and a variety of synthetic fibres. The second is Trichloroethylene, found in paint, glue and varnish and hence commonly given off by furniture.

Peace Lilies absorb these pollutants through their leaves, where they are transported down to the roots and eventually broken down by microbes in the soil. To optimise the air-purifying effect of your Peace Lily, make sure the soil surface in the pot is bare, rather than covered with ornamental gravel or potting grit, so pollutants can also be absorbed directly in to the soil.

I’d like to think that the air quality isn’t too bad in my room, and that my Peace Lily isn’t having to work too hard. Most importantly for me, I’ve enjoyed the calming quality that a bit of greenery brings to the room, and I shall be on the look out for other suitable pot-plants so I can continue to green up the rest of my indoor spaces.

peace-lily-830968_1920.jpg


Whalley Range; championing streets without herbicides

I am extremely privileged to live in Whalley Range.  There is a strong sense of community here; we love our streets, we care about gardening, and there are always activities taking place that contribute to making our environment an even more pleasant place to live, despite being so close to Manchester city centre.

Range Road Community Park, Whalley Range.

Range Road Community Park, Whalley Range.

For those of you who are local, you will know that community leaders have been engaging with Manchester City Council, and have agreed that a triangle of Whalley Range streets are to be kept ‘herbicide free’ this spring and summer.  Instead, we will be doing the weeding ourselves.  By hand. All helpers welcome!

What are herbicides, and how do they work?

Most herbicides (weed-killers) contain the active ingredient Glyphosate.  Glyphosate is a systemic, non-selective herbicide; it can be applied to foliage of any plant, where it then travels through the plant’s entire vascular system, resulting in its death. 

In addition to weed-killers for domestic garden use, Glyphosate is used widely in conventional, non-organic, agriculture by applying it before, or at the same time as crops are sown, to kill emerging weed seedlings before they compete with the crop for light, water and nutrients.  Glyphosate-based herbicides are also applied to walls, footways and tree-bases in urban areas such as ours, in order to suppress weed growth.

The impact of Glyphosate on the ecosystem

Using Glyphosate to control weeds may seem extremely desirable for stretched farmers and resource-strapped local authorities.  It is applied in the open air, so inevitably contaminates the surrounding environment, including the soil, water courses and the atmosphere, with the potential to impact directly on humans, animals and wildlife. Here are a few indirect impacts of using Glyphosate:

1. It’s harmful to pollinators: Many ‘weeds’ are flowering plants that are an important source of food for bees, butterflies, hoverflies and other pollinating insects.  Healthy and numerous pollinators are crucial for successful food crop yields.

2. It reduces plants’ resistance to disease: Research has shown that glyphosate blocks plants’ natural defence mechanisms, making them more susceptible to pathogens and disease.

3. It impacts on soil microbes: Soil microbes play a vital part in many essential processes, from decomposing organic matter, to creating topsoil, and the cycling carbon and other nutrients.  Soil mycorrhizae are invaluable for enabling plants to take up nutrients.  Repeated glyphosate application disrupts this microbial community, resulting in increased levels of soil pathogens and restricted plant nutrient-uptake. Find out more in this document by the Soil Association.

4. It causes decline in the earthworm population: Earthworms are important for breaking down and redistributing organic material in the soil.  They make the soil more penetrable to plant roots, thereby improving soil fertility.  Glyphosate-based herbicides affect earthworm reproduction, causing a decline in their population

Come and help us keep our streets herbicide free!

If you are local, come along and keep our streets herbicide-free by joining a weeding-working party on any of the dates shown on the poster below.  If you’re not local, maybe you could find out if there are any similar community initiatives in your area.

And if you want to find out, and join in with, what the Whalley Rangers are getting up to this year, just keep an eye on the website, or find us on Facebook.

52678082_2115162528775191_6574276005848940544_o.jpg

March 'things to do' in the garden

The days are lengthening (whoopee!) but so is the gardening ‘to do’ list. Despite being treated to a week of unseasonably warm weather last week, there is still the potential for frosts and cold snaps, so don’t be putting any tender plants outside just yet.

Here are a few of the things I’ll be getting up to in my own garden (or inside, in the case of seeds):

Seed sowing

I’ve just been nosing through the ‘when to sow’ calendars on the back of my various seed packets, and I realise that I really MUST sow the Sweet Peas soon, or they won’t have a chance to mature sufficiently to flower. I’ll soak the seeds overnight, and give the hard seed-coat a little nick, to help with emergence. This is known as ‘scarification’. I’ll leave my sunflowers until next month.

I received a heated propagator this Christmas, so for the first time, I’m also going to try starting some half-hardy annuals from seed; Busy Lizzies, upright Pelargoniums, Lobelia and Petunias.

Soil care

I haven’t given the soil in my border any TLC since moving in four years ago. I discovered some creeping buttercup whilst weeding last week. This can be an indication of poor drainage so I think some incorporation of sharp sand and organic matter is called for.

To prevent water loss, you could also apply a 5-10cm thick layer of mulch of garden compost, well-rotted farmyard manure or shredded bark. Water the soil first before applying though.

Lawn care

In some sunnier gardens (especially in warmer climes), there may be a need to give the grass a cut, with the mower blades on a high setting; it’s better to remove less material more frequently. I’ll be leaving mine for another few weeks, and will need to take care to avoid the crocuses, probably for about six weeks after they have finished flowering.

Repair any dips or bare patches by raking then sprinkling with a mixture of compost and grass seed. Don’t forget to water.

Shrubs and climbers

According to my various and numerous RHS resources, March is really the last month for planting bare root shrubs. In that case, I really must pull my finger out and get those blackcurrants in. Always full of good intentions, me…

Climbers that can be renovated with a hard prune include honeysuckles, ivies, rambling roses and winter jasmine. For deciduous climbers, look to see where the new buds are about to break, and try and identify where there are dead stems that can be pruned out.

Most importantly though, I shall just enjoy looking at and admiring the signs of spring as they emerge, and making plans for the new growing season ahead.

catkins-3988418_1920.jpg

February 'things to do' in the garden

Sincere apologies folks – we’re now over half way through February and I’m only just writing my monthly ‘things to do’ post.  And by the time many of you have any free time, it’ll be next weekend, and nearly March!

But no matter; judging by the various Facebook posts and even the sound of a neighbour’s lawn mower here in Whalley Range, it appears that everyone is already getting out and enjoying the spring sunshine in some shape or form so hopefully you’re already on it. 

It’s great to venture down the garden and appreciate the snowdrops, crocuses and daffodils as they appear.  I’d completely forgotten that I’d under-planted my Cordyline with crocuses last Autumn, so that was a nice surprise;

20190217_123316.jpg

So, if you haven’t already done it, here are a few things you could be getting on with:

Fruit and veg

Purchase your seed potatoes from your local garden centre.  Put early varieties in an open cardboard egg box, eyes up, on a window sill to ‘chit’.

Autumn-fruiting raspberries – those that produce their fruit in August or September (e.g. cultivars such as ‘Autumn Bliss’ or ‘Polka’) - should be pruned by cutting canes right down to the ground. Note; not for summer fruiting varieties.

I have a new heated propagator so I am going to sow some tomato seeds and get them off the ground.  More on that another day!

Shrubs

February is still a good time to plant bare-rooted trees and shrubs, whilst they are still dormant, assuming the soil isn’t frozen or water-logged.

Prune late flowering shrubs such as Buddleia davidii (butterfly bush), the deciduous Ceanothus ‘Burkwoodii’ and hardy fuchsias.  Don’t be scared; you can be fairly brutal, cutting right down to just a couple of buds or shoots on each stem.  After you’ve finished, feed them with an organic fertiliser and mulch with garden compost or well-rotted farmyard manure.

For early-flowering shrubs such as Forsythia x intermedia, Hamamelis x intermedia and winter-flowering Jasmine (Jasminum nudiflorum), wait until they have finished flowering before pruning.

Prune the roses (see previous blog).

Flowering plants and herbaceous borders

Give the borders a bit of a weed, and spread some mulch. 

If you haven’t already, cut away last year’s dead or dying growth from herbaceous perennials, to allow the new growth to emerge unhindered. I have just been doing this to my Japanese Anemones, Catmint, Lemon balm and Rudbeckia, to name a few.

Plant snowdrops; these are best planted now, ‘in the green’.

If you’ve been storing dahlia tubers (or have purchased some), start them up by placing on the top of shallow trays of compost, and spraying with clean tap-water occasionally.  This will encourage buds to grow.

Most importantly of all, get out there and enjoy the sunlight and lengthening days!

flower-2157883_1920.jpg

It’s Valentine’s day; time to prune your roses

I’ve avoided roses, to date.  I was always under the impression that caring for them successfully was some kind of dark art.  True – roses seem to get a vast array of pests and diseases.  But with good care and maintenance, you should be able to improve their resistance against those, and annual pruning ensures that your roses bloom well, later in the year.

Roses are best pruned from mid to late February, in to early March, depending on your location.  Very seasonally timed that our college tutor should choose Valentine’s day for our rose-pruning assessment (not that we were pruning any blooms, of course).  And as it turns out, it really isn’t that hard, so I don’t know what I was worried about.

As most of my regular readers already know, I am just surfacing from some RHS theory exams, where I learnt something along the lines of ‘hybrid tea roses need to be pruned to 10-15cm from the base, and floribunda roses 25-30cm…’ plus some other advice on pruning out the oldest stems completely, every three years.

However, the reality is that many of us have no idea what group our roses fall in.  No need to worry, it seems. For all bush roses, our very practical and down-to-earth tutor advises to just prune them all to knee-high.  She’s quite short, so somewhere between calf and knee should be fine.  The aim is to achieve a healthy, well-shaped bush with an open centre, so the air and light can circulate.  Make sure you have sharp secateurs.

Defoliate to get a better view

First of all, we removed last year’s leaves from the rose bush that we were working on, for two reasons; firstly, this helps you to see its general shape and structure, and secondly, because this particular specimen had rose black spot.  All foliage and prunings were collected up and put in the general waste, not the compost heap, in order to prevent the spread of this fungal disease.

Rose black spot

Rose black spot

Remove dead stubs and stems

We then removed any dead stubs leftover from the previous year’s pruning, by cutting right back to the healthy stem.  Old, dead hips and flower stems were pruned off by cutting down to a suitable outward facing bud; have a careful look to see the direction in which the end bud will grow.  You want it to grow outwards, away from the centre.  Move down the stem until you find a suitable bud, and make a sloping cut just above it, with the angle of the slope aligned with the direction of the bud.

Remove any crossing stems

If stems cross, they can rub against each other and cause lesions that are then susceptible to attack by diseases.  Prune out any rubbing and crossing stems, retaining the strongest, healthiest one.

Prune to shape

Work your way around the bush, pruning to knee-high in the way described above, thinking about the direction the buds are going to grow in, and whether your work will achieve a well-shaped, open-centred bush. 

And finally…

The most helpful tip I received today was to concentrate on pruning one stem at a time and finish that one completely before getting distracted by other stems, also in need of pruning.

The final task is to clean the secateurs with alcohol or disinfectant, to avoid the spread of any diseases between one rose bush and another.  The bushes didn’t half look better, when we’d finished. 

roses-2604125_1920.jpg